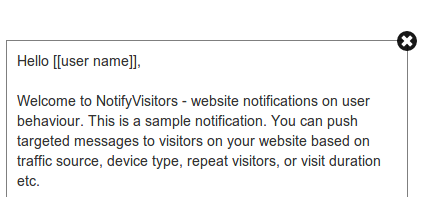
Dynamic Notifications offer you a nice way of showing highly personalized messages or offering by adding dynamic text such as username, dynamic discount value etc.
You can add tokens to any of the 3 fields inside your Notification:
- Description – you can use specific tokens like username in your notification content
- Call to action button text – use tokes to say something like “Hurry Mr. Sid !” on the button
- Call to action URL – use tokens in the URL for tracking or user personalization parameters
Defining a token
We call placeholders of the dynamic text as Tokens. Tokens should be enclosed within a double pair of square parentheses like.[[yourTokenName]] While creating/editing a Notification, you can any number of such tokens to the input fields. Before displaying this Notification on your website, we scan all the four fields, mentioned above, for tokens.
Contents
Setting default token values
After creating a Notification, if you used tokens in any field, you’ll get to see a table on the same page. Therein, you’ll see options to set their corresponding default values. You are supposed to pass the token data via our Javascript API (next section) – in case you don’t we replace the tokens with these default values. You can also choose to Hide notification if any of the token values are empty. If you select this option, in a corresponding situation, the Notification is not shown on your website.
Passing token data via the Javascript API
E.g. if your tokens were[[user]], [[place]] & [[gender]],
Add this extra parameter in the javascript API,
notify_visitors.tokens = {'user':'', 'place':'', 'gender':''};
Filter clickthroughs based on token data
Every time users, on your website, click on the Notification’s call-to-action button, we record the click and also persist the token data (realized values) for that user. This data is presented back to you in the analytics section wherein you can filter clicks based on the token value.


 Email
Email SMS
SMS Whatsapp
 Web Push
 App Push
 Popups
 Channel A/B Testing
  Control groups Analysis
 Frequency Capping
 Funnel Analysis
 Cohort Analysis
 RFM Analysis
 Signup Forms
 Surveys
 NPS
NPS Landing pages personalization
  Website A/B Testing
  PWA/TWA
 Heatmaps
 Session Recording
 Wix
Wix Shopify
 Magento
 Woocommerce
 eCommerce D2C
  Mutual Funds
 Insurance
 Lending
  Recipes
  Product Updates
 App Marketplace
 Academy


Add comment