
 Email
Email SMS
SMS Whatsapp
 Web Push
 App Push
 Popups
 Channel A/B Testing
  Control groups Analysis
 Frequency Capping
 Funnel Analysis
 Cohort Analysis
 RFM Analysis
 Signup Forms
 Surveys
 NPS
NPS Landing pages personalization
  Website A/B Testing
  PWA/TWA
 Heatmaps
 Session Recording
 Wix
Wix Shopify
 Magento
 Woocommerce
 eCommerce D2C
  Mutual Funds
 Insurance
 Lending
  Recipes
  Product Updates
 App Marketplace
 Academy
We are excited to announce that this month, we have introduced several new features and enhancements across our software. In this release notes, we will cover some of the key updates. Check out the latest additions below:
- Reporting API to call out statistics and other data from our system
- “SFTP” option for exporting data from NotifyVisitors
- “Export Logs” option to export user logs of all campaigns at once
- Option to not close popup when clicked outside
Let’s examine each feature more closely to understand how they work and how to incorporate them.
1. Introducing Reporting API
Explore our new APIs that allow you to easily access campaign stats, channel stats, and channel time-series stats directly from our system. This feature is perfect for users who want to integrate this data into their own dashboards or other platforms.
A. Campaign stats API – With this API you will receive comprehensive details and statistics of a particular campaign. Kindly go through our documentation “Get analytics for specific campaign” for API endpoint and other information. In the body of the request, be sure to include the date range, channel, campaign ID, and time series for accurate data retrieval.
Here’s an example for the same:

In response you will receive comprehensive campaign details and statistics once you pass this API. This includes information like campaign name, sent day, total sent, delivered, clicks, transactions, revenue generated, and more. Additionally, you will also get browser/app wise stats such as delivered, clicks, failure, and other relevant data.
Here is a response for the above example API passed

B. Channel stats API – You have the ability to retrieve all statistics for a specific channel by utilizing the channel stats API. For instance, by inputting the channel stats API for email, you will receive information on all email channel campaigns, reports based on mode, and reports based on labels.
To access the channel stats, go through our documentation “Get analytics for specific channel” for the API endpoint and include parameters such as date range, channel, delivery type, and split by filter in the request body.
Here’s an example for the same:

C. Channel time series stats API – The channel time series statistics encompass data on trends for each day, week, month, and year. In contrast to the Channel statistics API that provides data based on Campaign ID, the time series API generates a daily breakdown of metrics such as sent, delivered, and clicks within the specified time frame.
You can access the channel time series stats by going through our documentation “Get time series analytics for specific channel” for the API endpoint and other information. When making a request, remember to include parameters such as date range, channel, delivery type, and split by filter in the request body.

You can access your API key by navigating to settings and then store integration. Once there, you can easily copy your API key from the right-hand side. If you need a separate API key for reporting APIs, you can create one as well. Click here for more information.
2. Added the “SFTP” option for exporting data from NotifyVisitors
We have recently included the SFTP configuration option so our partners can export NotifyVisitors data to their SFTP server. To set this up, navigate to “Settings” and then the “Integration” tab under Partners. Click on the “Add SFTP key” button.

Previously, this feature was solely for importing data to NotifyVisitors, but now you can export as well. Simply click on the “Configuration Type” dropdown menu and choose the “Export” option. Enter your SFTP credentials like hostname, username, password, port number, remote directory, and save.

Remember, you can only add one SFTP key for import, but you can add multiple keys for exporting.
Once your SFTP key is added, proceed to export data. Head to “Settings,” then “Export,” and click on “Create new export data.”

Choose the data type you wish to export and configure other settings.

Lastly, in the “Export Partner” dropdown, select “SFTP,” choose your hostname from the SFTP credentials dropdown, and hit submit to start exporting data to your SFTP server.

You can monitor the export status under the Status tab and access additional options like viewing details, downloading list, or deleting export by clicking on the three dotted button under the action tab.
3. Introducing “Export Logs” option for campaigns revenue
We’ve just added a new button to the campaign revenue page called “Export Logs.” This allows you to export all the transactions that were attributed to NotifyVisitors campaigns in one go. Previously, the page only had a button for exporting data, which included key revenue indicators like generated revenue, transaction books, average revenue per user, and more from all campaigns and journeys.
To utilize the new Export logs option, navigate to real impact, then campaign revenue, and click on the “Export logs” button.
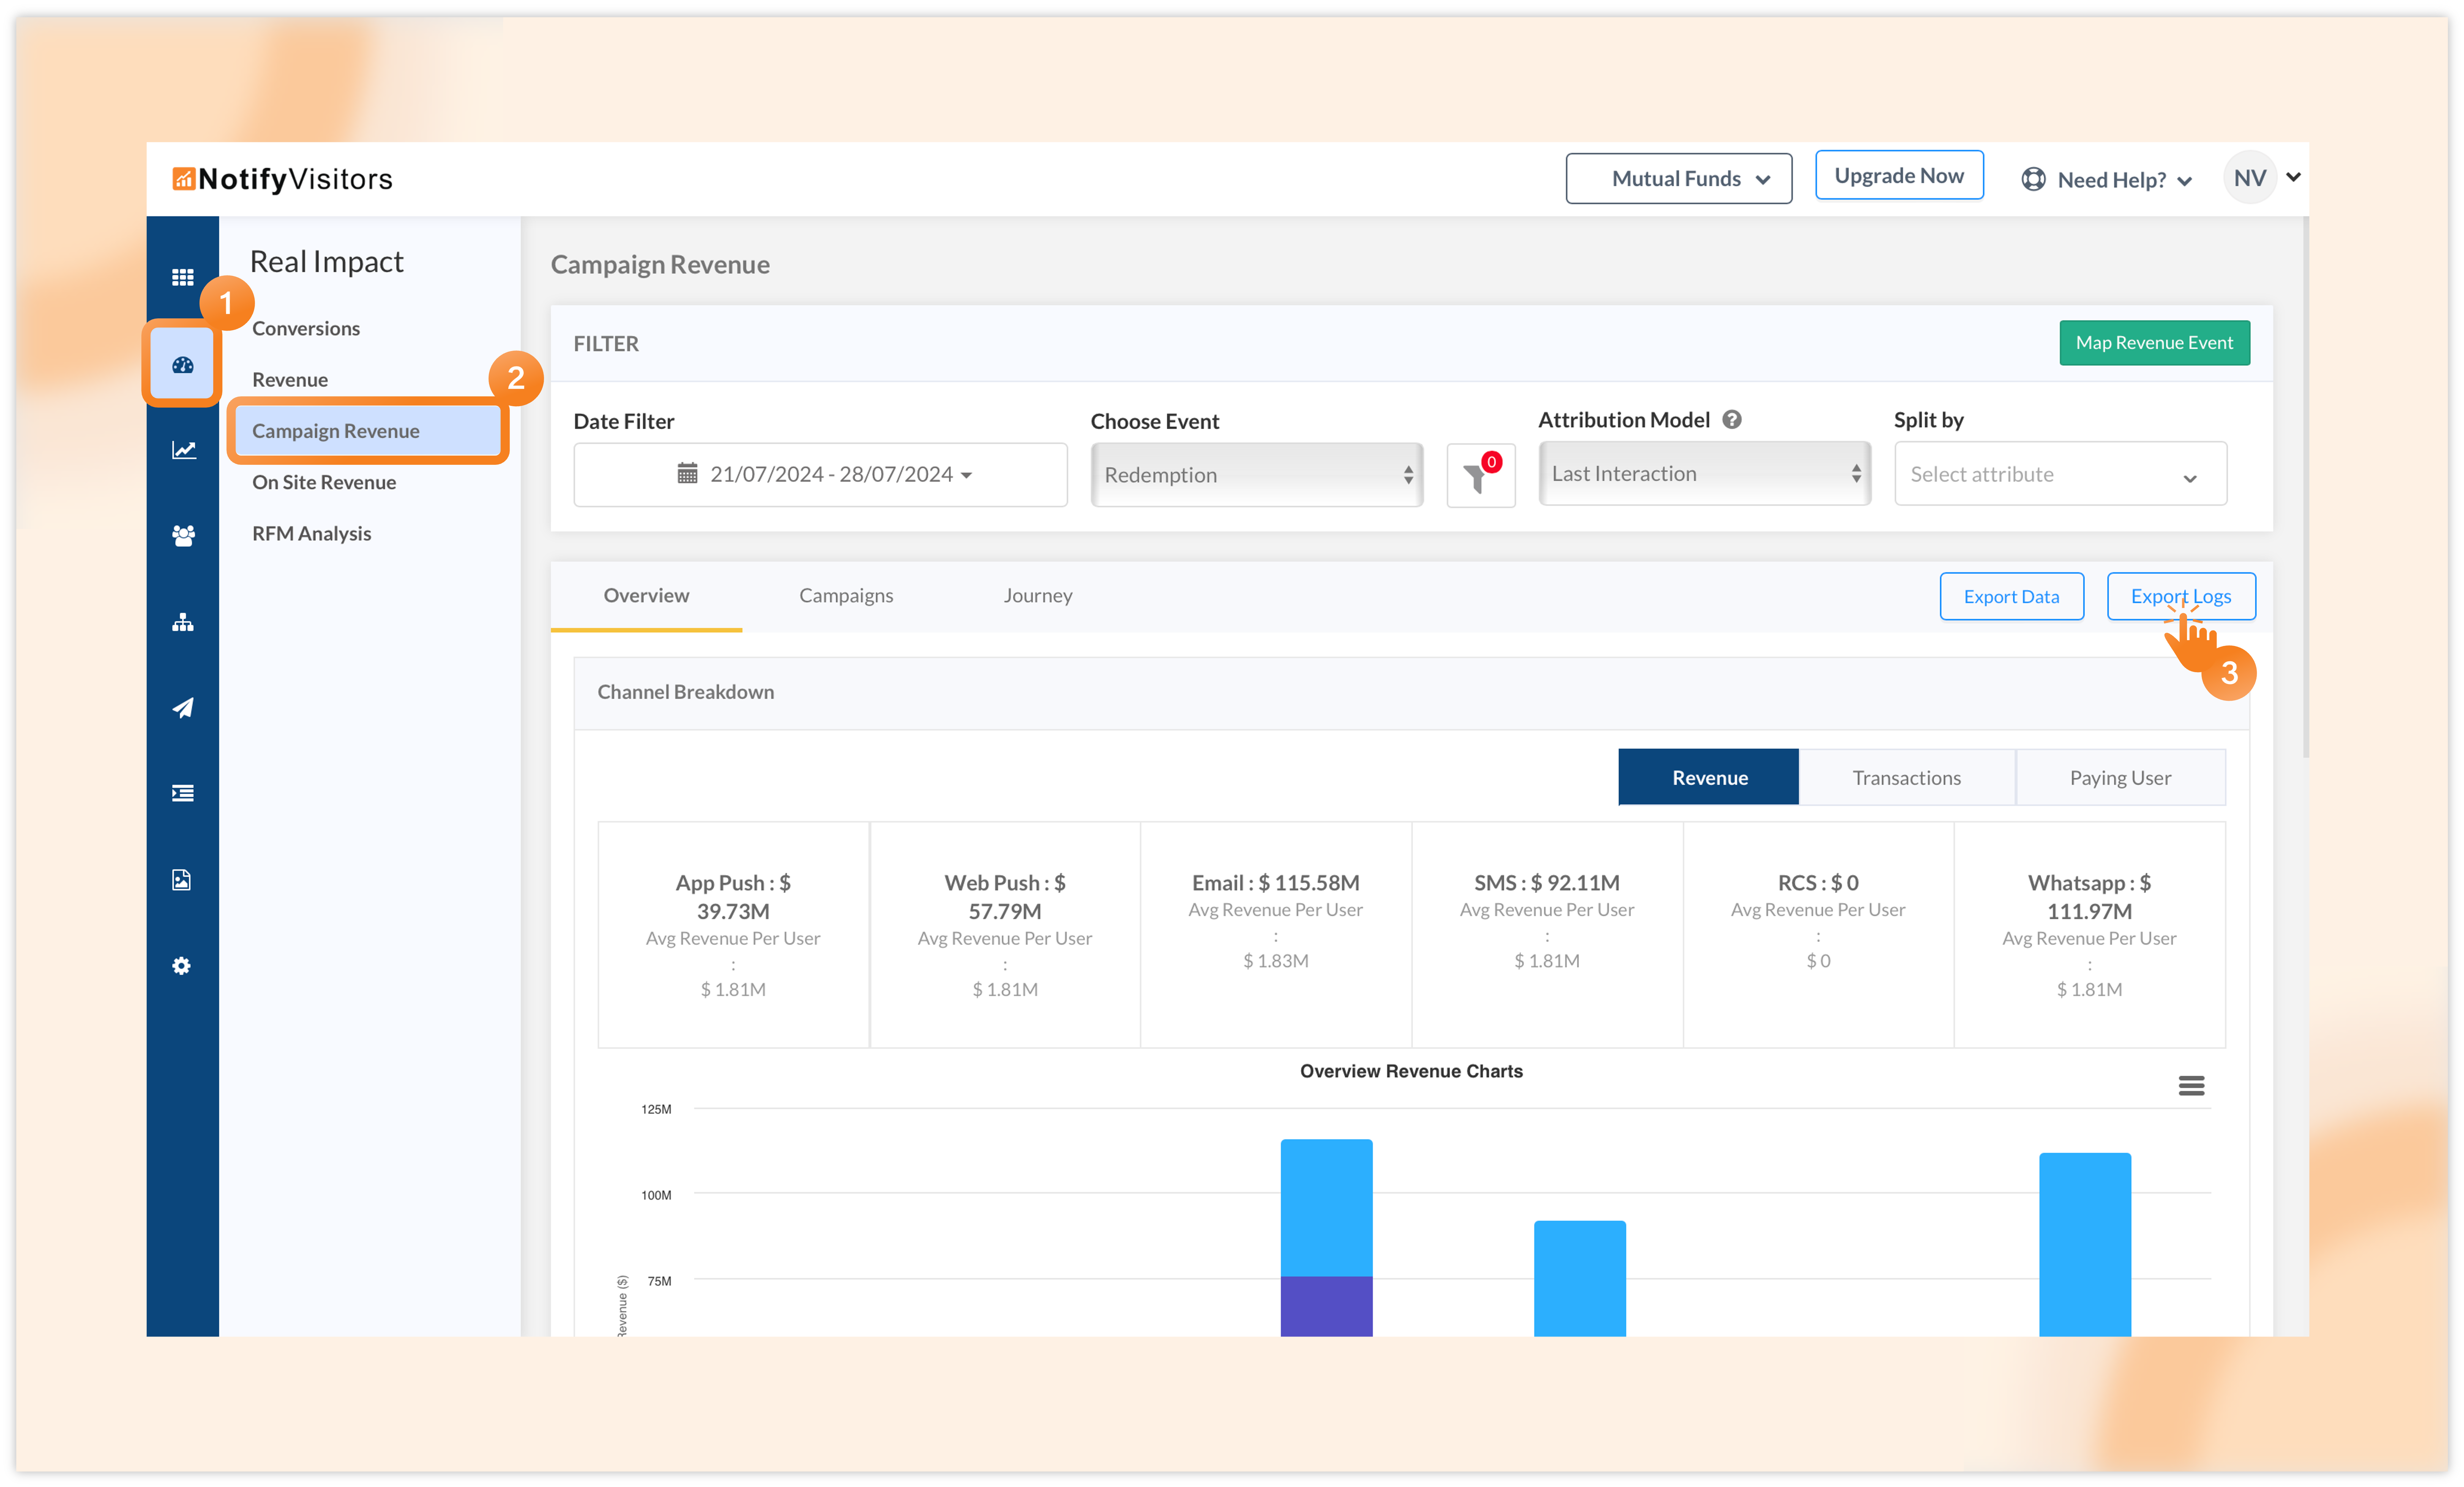
Enter your email address and submit. A CSV file containing all user logs will be sent to your email.

4. Added option to not close the popup if clicked outside
We’ve included a new feature that allows you to prevent users from closing your onsite campaign (website popup or lead form) by clicking outside of it. This means that the campaign can only be closed using the cross button.
To utilize this feature, begin by creating a new website popup or signup form, or editing an existing one. This will bring you to the drag-and-drop editor, where you can customize your onsite campaign. Once you’ve finished designing, go to the Setting tab where you’ll see the new “Close on clicking outside of popup” option.

By default, the “Yes” option will be chosen, allowing the popup to be closed either by clicking outside or using the cross button. Select the “No” option if you prefer the popup to not close when the user clicks outside of it.
Please note that this feature is not applicable to sticky bar based popups, as these popups cannot be closed by clicking outside.
Conclusion
We are thrilled to bring you these powerful new features and enhancements. With the introduction of the Reporting API, SFTP data export option, comprehensive Export Logs feature, and the enhanced popup behavior settings, we are committed to providing you with tools that enhance your user experience and streamline your workflow.
To stay informed about our latest releases and access these features immediately, click the “Allow” button at the top of your screen for push notifications. For inquiries, suggestions, or a demo, reach out to us at support@notifyvisitors.com. Our dedicated team is ready to assist, ensuring you maximize the benefits of these exciting enhancements.

In this month's release notes, we will be highlighting some of the major updates. We are thrilled to present the Read more

In these release notes, we will be discussing some of the key releases for the month of June. We are Read more

Welcome to our latest release notes! This month we released some new features to optimize your experience related to onsite Read more

Welcome to our latest release notes! This month, we are excited to introduce several new features and enhancements for catalog Read more