
 Email
Email SMS
SMS Whatsapp
 Web Push
 App Push
 Popups
 Channel A/B Testing
  Control groups Analysis
 Frequency Capping
 Funnel Analysis
 Cohort Analysis
 RFM Analysis
 Signup Forms
 Surveys
 NPS
NPS Landing pages personalization
  Website A/B Testing
  PWA/TWA
 Heatmaps
 Session Recording
 Wix
Wix Shopify
 Magento
 Woocommerce
 eCommerce D2C
  Mutual Funds
 Insurance
 Lending
  Recipes
  Product Updates
 App Marketplace
 Academy
Welcome to our release notes for the month of August! Our software is under continuous development to improve the overall experience of our users and to simplify the CDP tools. This month, we have made multiple improvements and added several new features. In this release, we’ll discuss some major new features, including:
- Segmenting users converting or dropping off at any funnel stage
- Dynamic product price options in product catalog popups
- Preview feature for popups and forms to see how they will appear on your website
Let’s dive in to explore these features.
1. Creating segments of users converting or dropping off at any funnel stage
This feature allows you to easily create segments of users who either convert or drop off at any stage of a funnel, enabling targeted engagement with these users.
Steps to create a segment:
- Choose a funnel: Start by creating a new funnel or selecting an existing one from the Funnel list dropdown menu.
- Create a segment: Once you’ve selected your funnel, click on the newly added “Create Segment” button.
- Configure segment settings: With this, a “Create Segment” window will appear. Here, provide a name for your segment.
- Static: Includes users within the selected date range only. The segment will not update automatically.
- Precomputed: Automatically updates the segment based on the number of days in the chosen date range.
For example, if you set up a funnel with a date range from June 1 to June 30, you’ll have a total of 30 days. This means your precomputed segment will refresh automatically to include data from the last 30 days. On the other hand, if you choose a static segment, it won’t update automatically and will only reflect the data from June 1 to June 30.
- Select segment criteria: From the dropdown, choose whether you want to segment users who have dropped off or those who have converted at any stage of the funnel.
For an example, we are going to select “Converted Users.” With this, the system will display the funnel steps along with the number of users who converted at each step.
- Define your segment: Select the specific funnel step for which you want to create a segment.

At the bottom of the window, a segment definition will appear, including relevant user properties.
- Create and use the segment: Click “Create” to finalize your segment. To view and manage your segment, visit the “Segment” section in the panel. You can then use this segment to target users through campaigns or automated journeys.
With these steps, you can effectively segment and engage with users based on their behavior within your funnel, enhancing your targeting strategies.
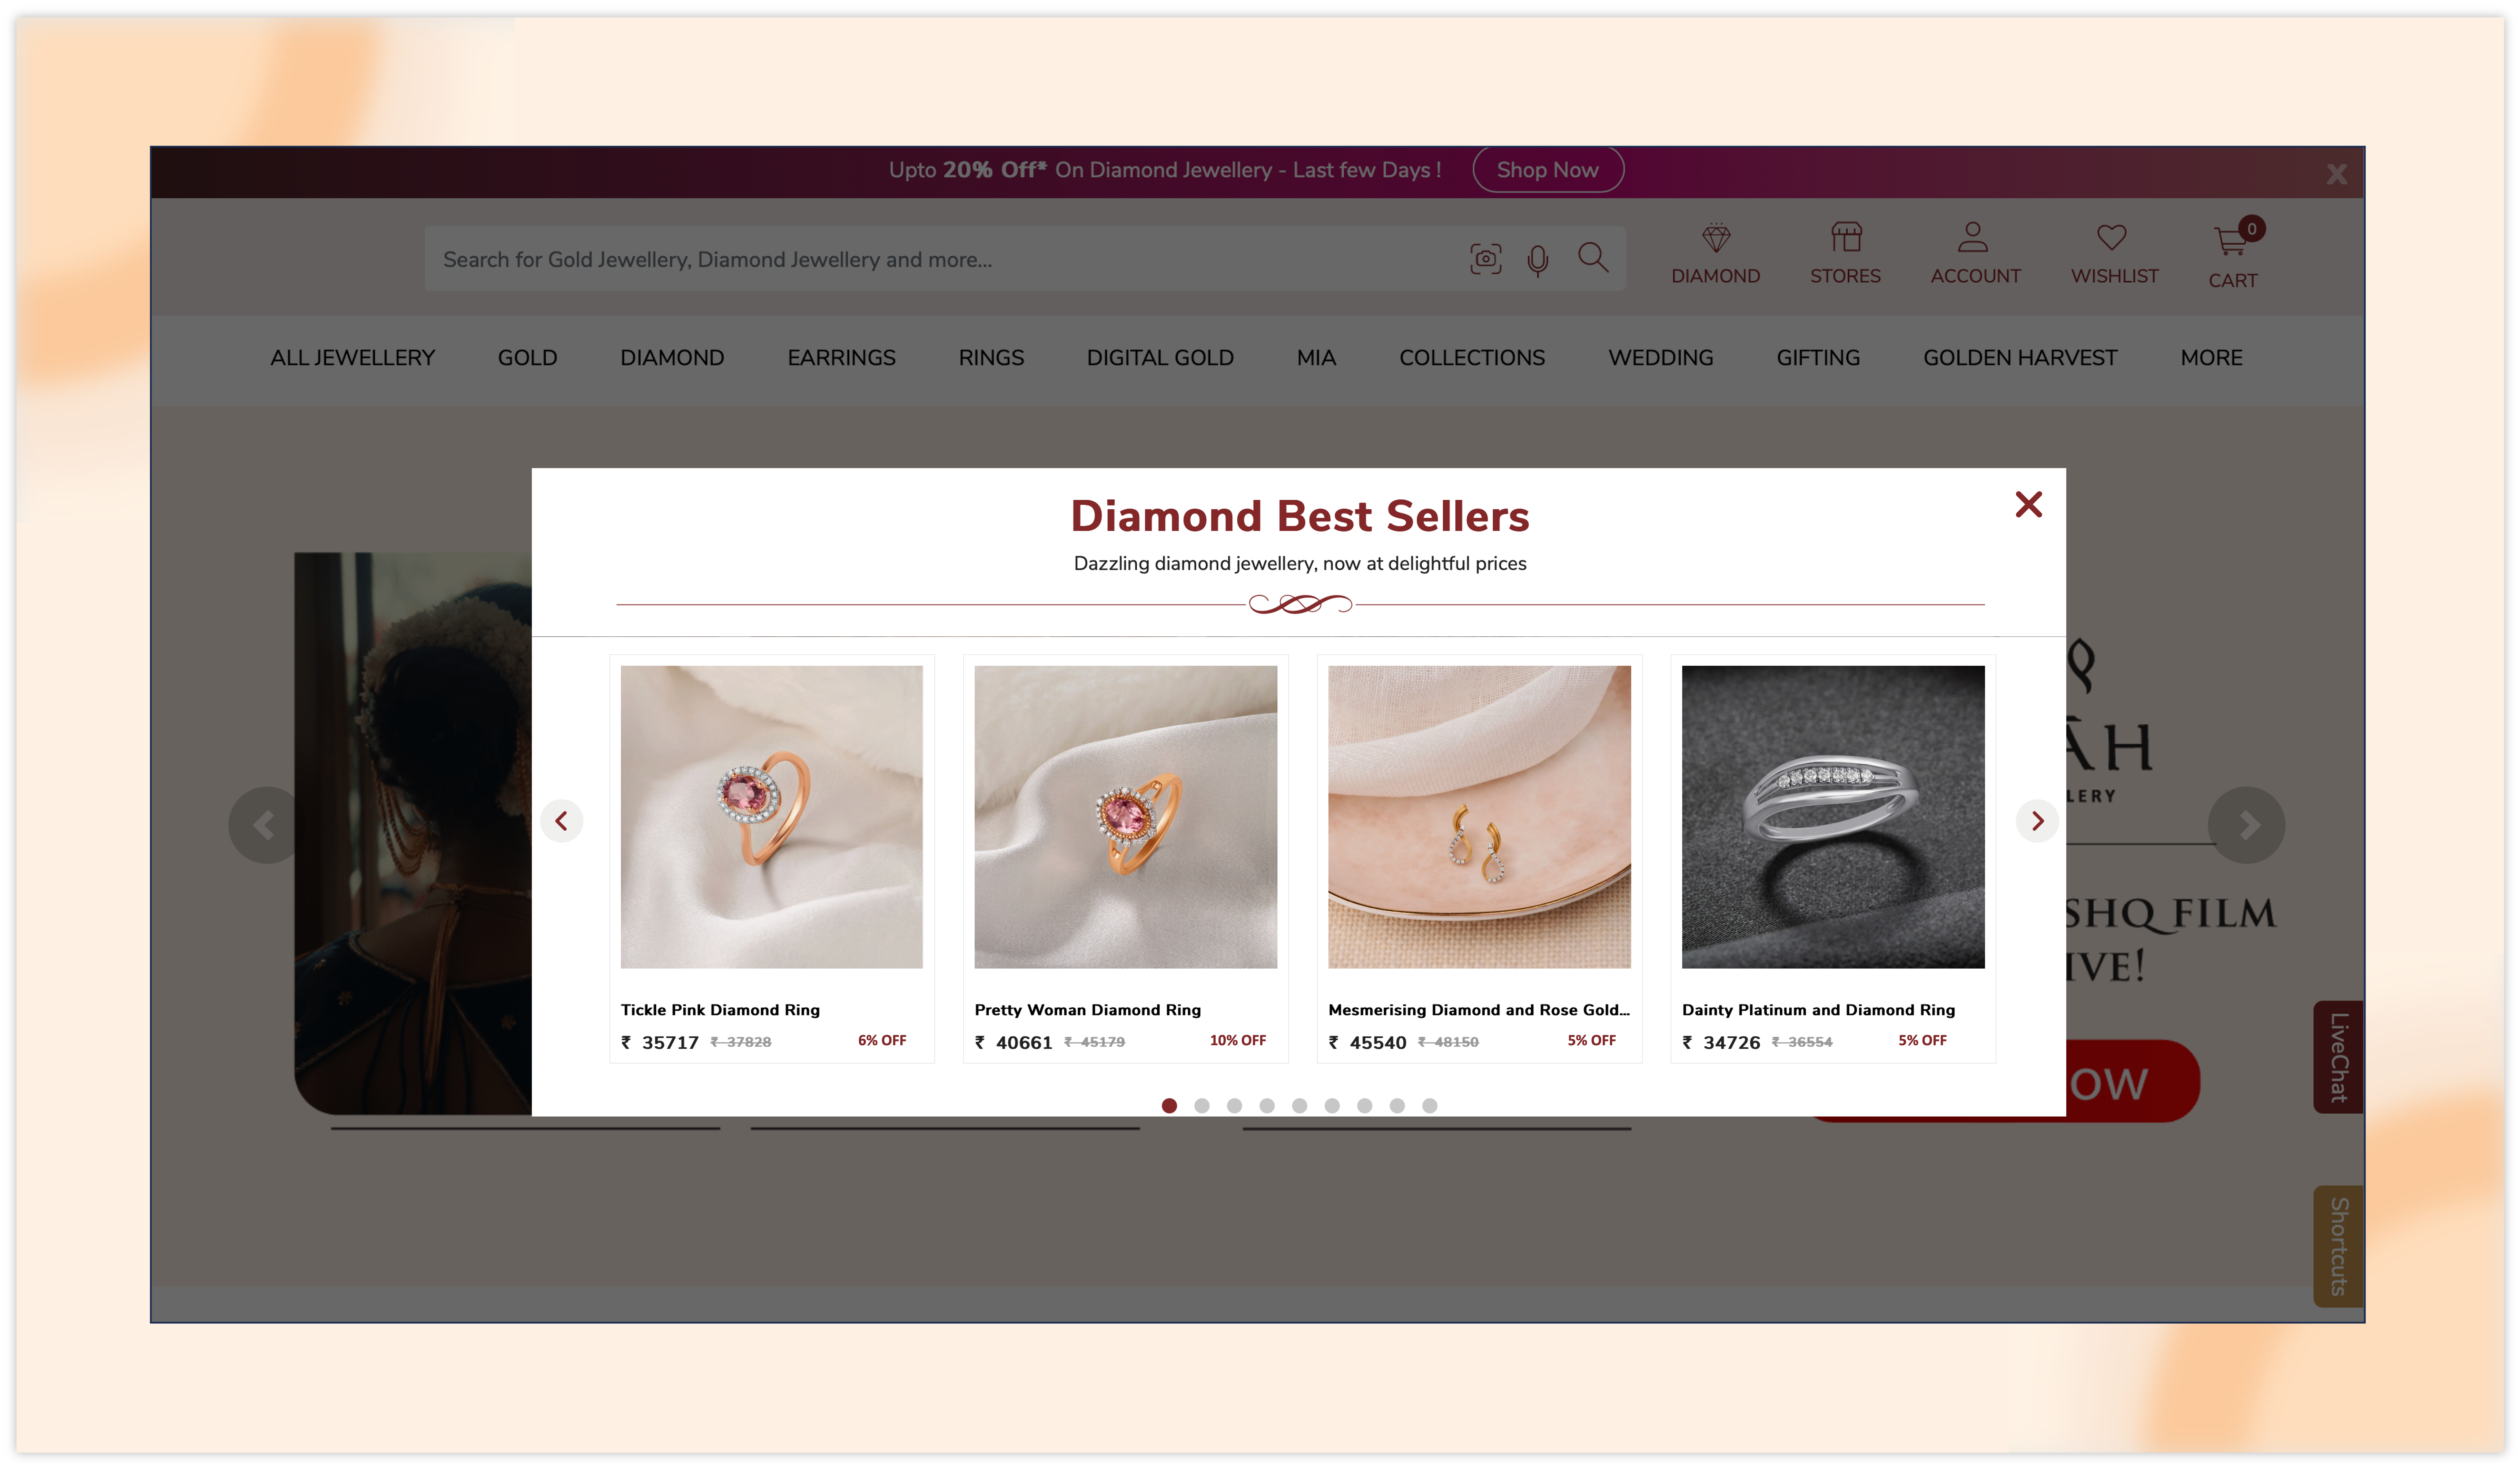
2. Introducing dynamic product price options in product catalog popups
We’re excited to introduce dynamic product pricing options in your catalog-based popups. With this feature, whenever a product’s price changes on your store, the updated price will automatically reflect in your catalog popup. You can also display dynamic discounted prices and discount percentages.
How to use the dynamic pricing feature:
- Create a website popup: Begin by creating a new website popup with the “Populate Product from Feed” option. A window will appear, prompting you to select a product feed type. Choose your preferred feed and click “Continue with feed.”
- Configure product display options: In the next configuration window, locate the “Fields to be Shown in Card” option. In this, select the newly added Product Price option to display dynamic prices in your popup.
To display the discount price and discount percentage alongside the original price, select the Compare at Price option as well.
- Select the number of products: Next, choose the number of products you want to include in your popup. We’ve increased the maximum limit from 5 to 15 products per popup, giving you more flexibility in showcasing your catalog.
- Customize your popup: Configure the remaining settings according to your preferences. Once all done, drag and drop your created catalog row onto your popup. Here, you can adjust the color, position, and styling of the original price, sale price, and discount percentage as needed.
- Preview and embed: You can also preview the popup (a newly added feature that we’ll discuss next) to see how the product price, discounted price, and discount percentage will appear.
These popups can also be embedded directly onto your webpage.
- Ensure accurate price mapping: To avoid any errors between the original and sale prices, make sure to map your original price to the “Price” attribute and the discounted price to the “Sale Price” attribute when setting up your product catalog. This allows our system to correctly identify and display the pricing information.
- Dynamic stock display (optional): You can also map your stock inventory to dynamically show the number of products available in stock.
With these steps, you can effectively showcase dynamic product prices, discounts, and stock levels, enhancing your customers’ shopping experience.
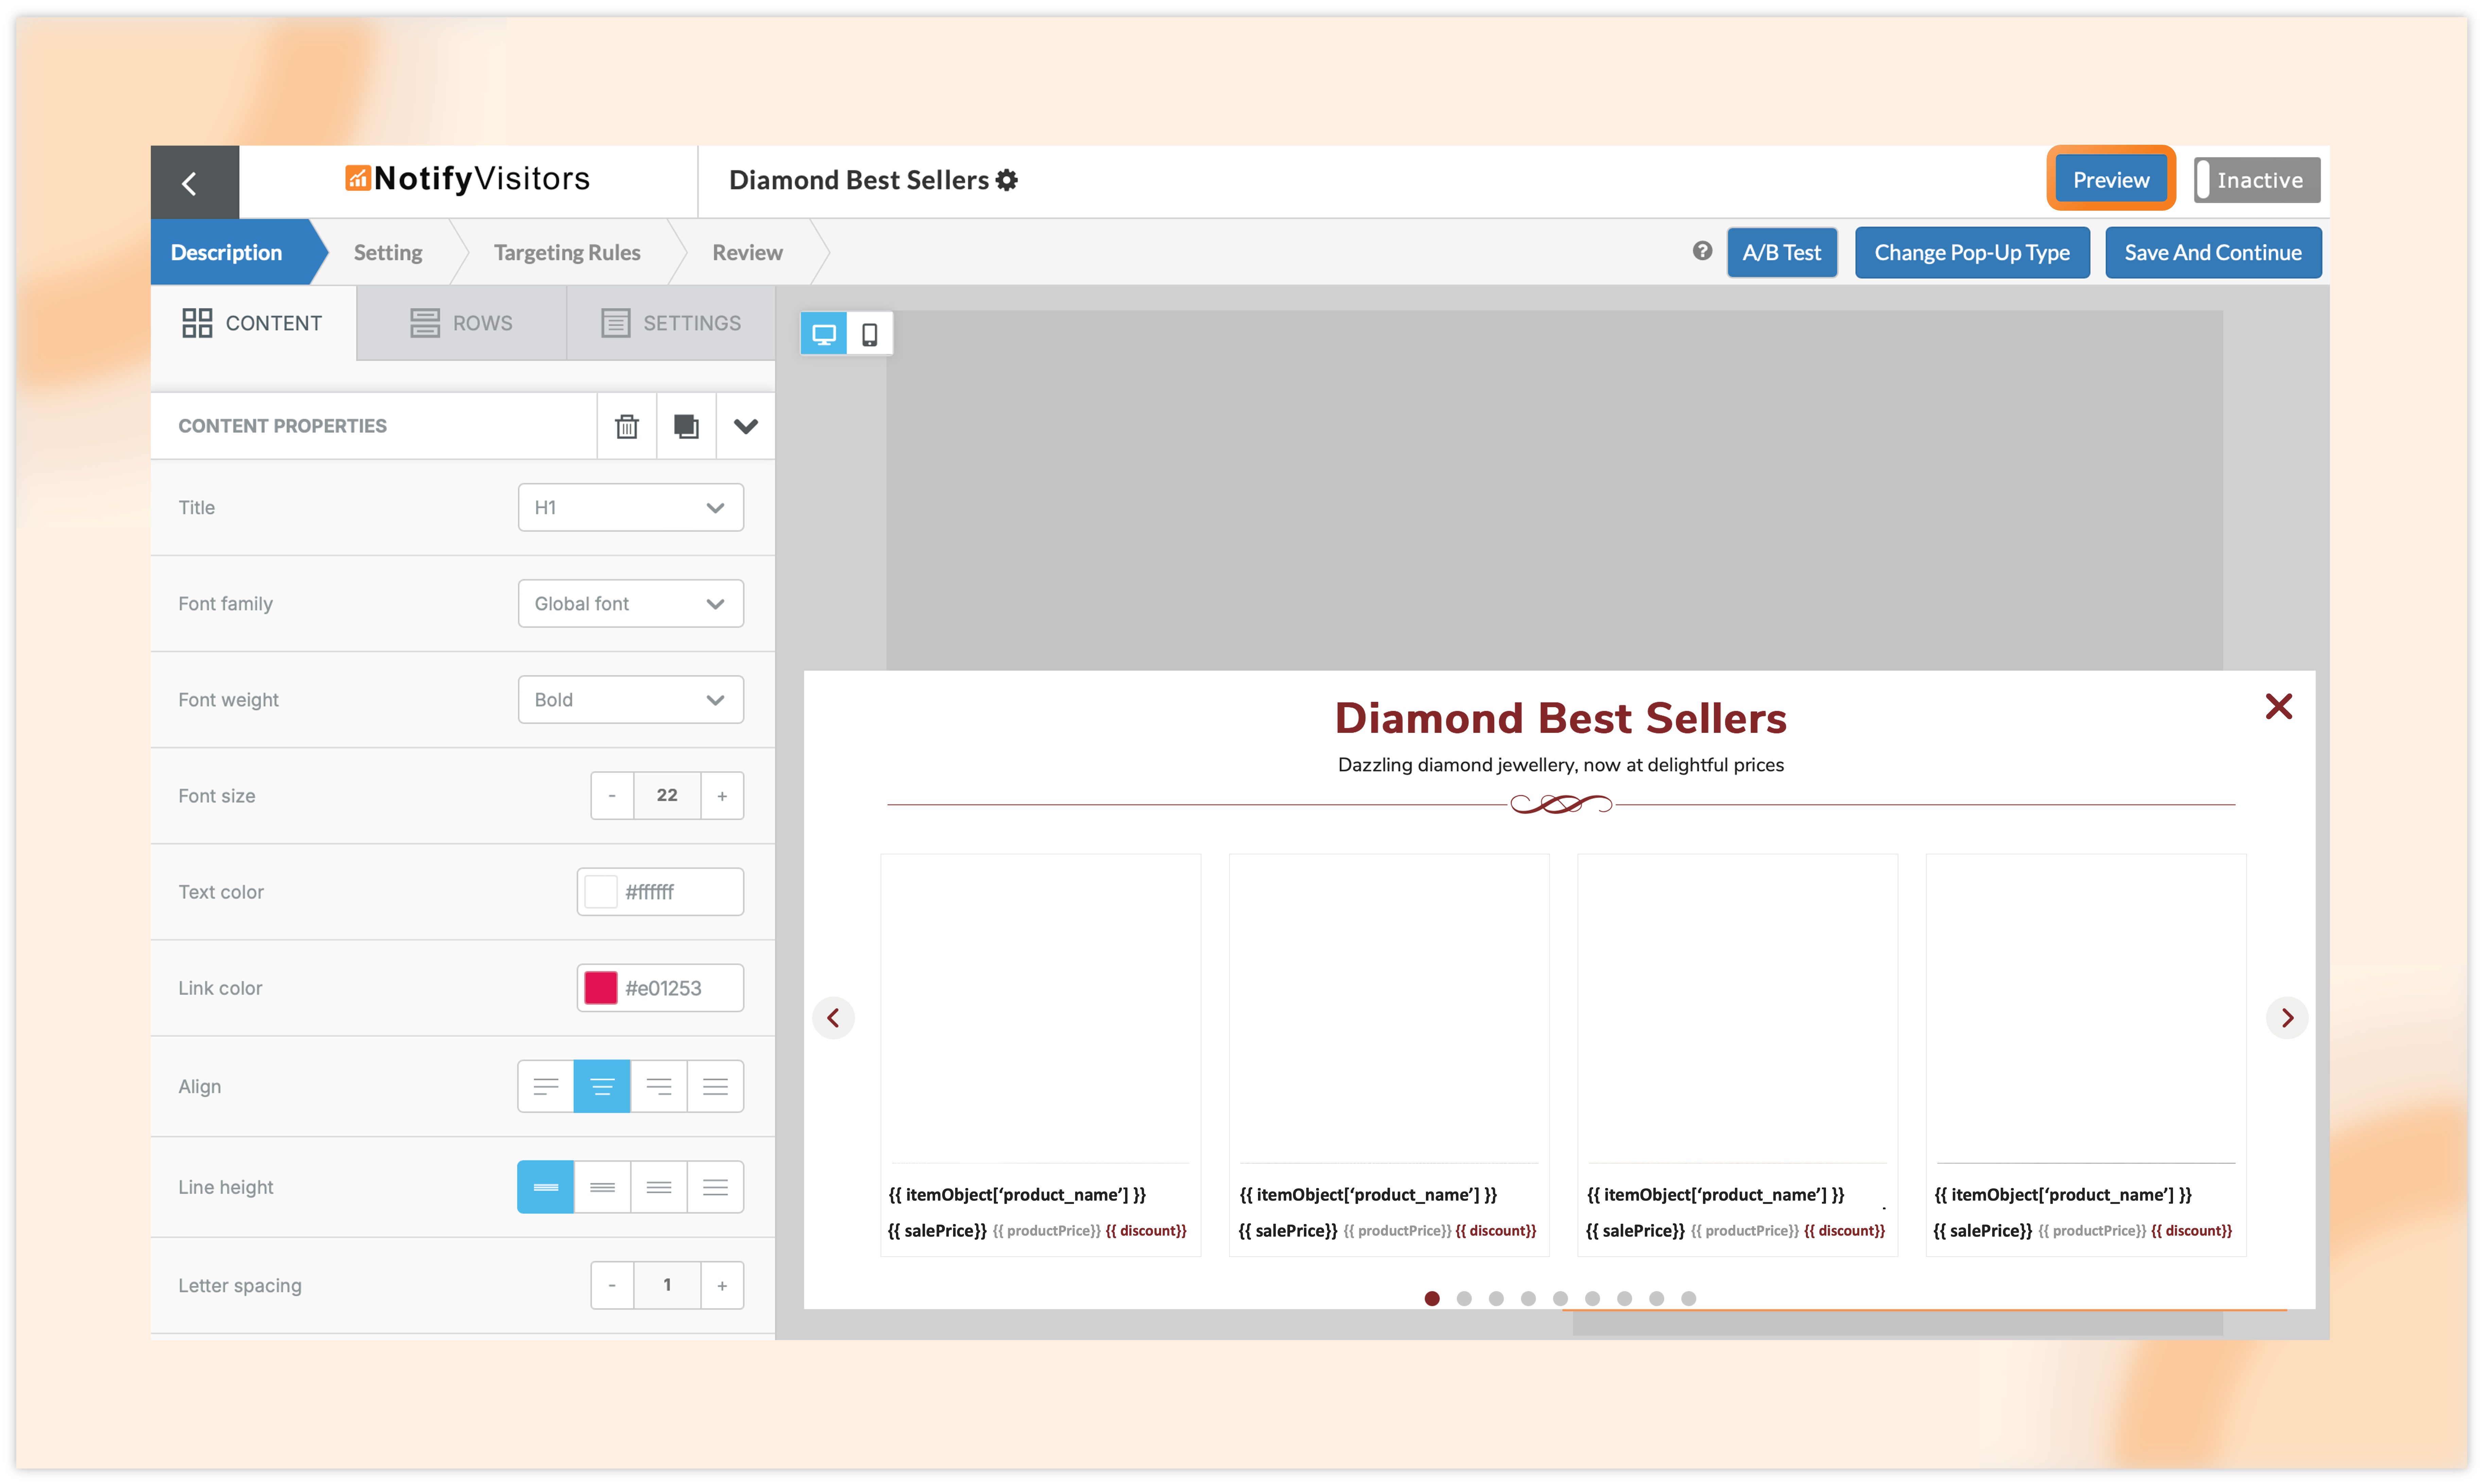
3. Introducing “Preview” feature for popups and forms to see how they will appear on your website
The “Preview” feature has been added to popups and forms, allowing you to see how they will appear on your website. With this feature, you can check out your designed lead form or website popup on any site you choose before it goes live. This helps you visualize how the popup will look in action.
To use this, simply set up a new onsite campaign (either a popup or signup form). Once you’ve created it, you’ll notice the new Preview button at the top right corner.
Click this button, and a popup window will open with your brand’s URL. If you want to see how the popup looks on a different website, you can easily change the URL manually. Then, click on “create preview link,” and a link will be generated for you.
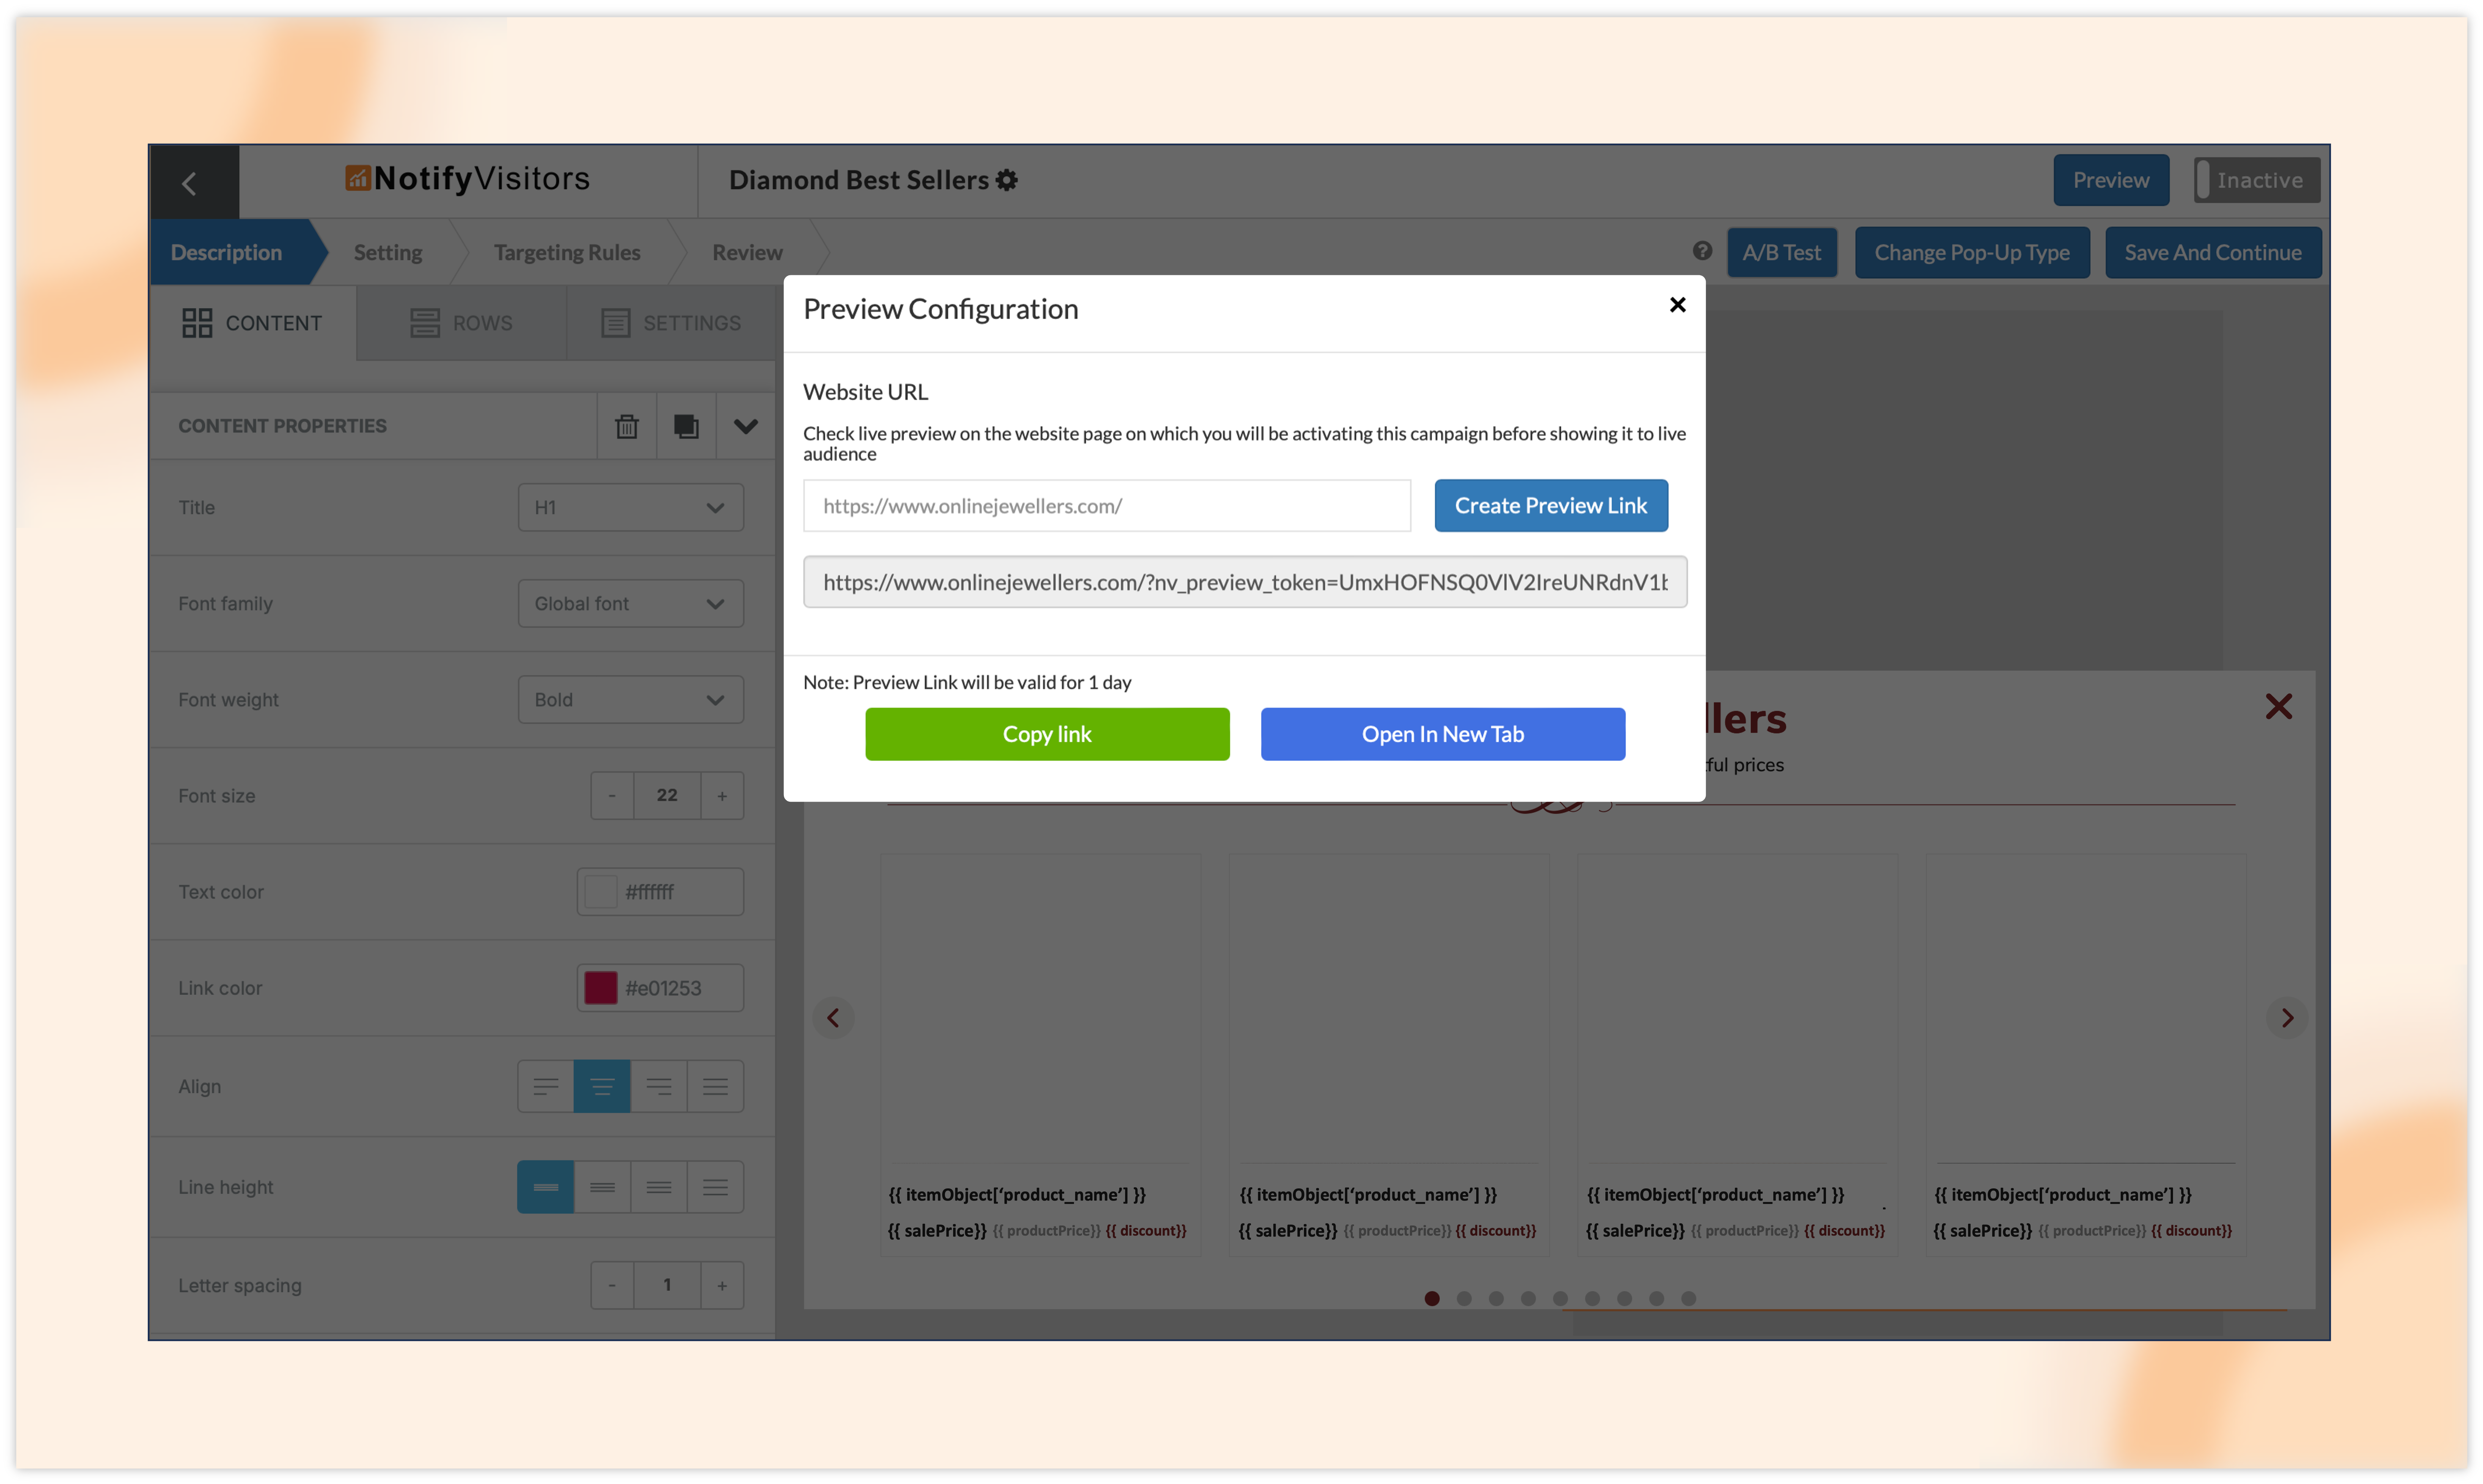
You can either copy this link to share with others or click “open in new tab” to view it yourself. The popup will display on the site just as it will when it goes live, including all targeting rules, dynamic tags, and other features.
Keep in mind that the preview link is only active for 24 hours. If you wish to view the popup again after that time, you’ll need to create a new preview link.
Conclusion
We’re excited for you to explore these new features and improvements, designed to elevate your experience and equip you with even more effective tools to connect with your audience.
To keep up with our latest updates and gain instant access to these features, simply click the “Allow” button at the top of your screen for push notifications. If you have any questions, suggestions, or would like to request a demo, please contact us at support@notifyvisitors.com. Our committed team is ready to assist you in maximizing these enhancements!

In this month's release notes, we will be highlighting some of the major updates. We are thrilled to present the Read more

We are excited to announce that this month, we have introduced several new features and enhancements across our software. In Read more

Welcome to our latest release notes! This month we released some new features to optimize your experience related to onsite Read more

In these release notes, we will be discussing some of the key releases for the month of June. We are Read more

